Getting Started with Data Access Services
This tutorial walks you through the general steps of creating query, SQL and repository services. It is assumed that you have just completed
Getting Started with Service Builder, and have created an application named myApp and module named myMod. The query, SQL and repository services for this tutorial will be created in the myMod module.
Like the previous tutorial, the sample database used for this tutorial is the classicmodels database from mysqltutorial.org. The ER diagram is available here.
The query, SQL and repository services selected for this tutorial are relatively simple. For more complex examples, please move ahead to the Deep Dives for data access service.
Prerequisite
Completion of Getting Started with Service Builder.
Create Query Service
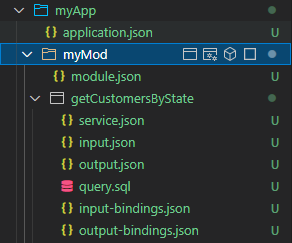
For this tutorial, we are to create a query service to return a list of customers by state.
Steps
-
Generate service
- From
myModmodule bar, clickNew Query Serviceicon .
. - Enter
getCustomersByStateas service name. Hit Enter.
A service named
getCustomersByStateis generated: - From
-
Specify Input
- Open
input.jsonfile -
Type:
- Save and close the file
The input for this service contains the single query parameter:
state. - Open
Tip: use Ctrl + S to save file and Ctrl + W to close file.
-
Specify Output
- Open
output.jsonfile -
Type or paste:
- Save and close the file
The output for this service is an array of
customers.In practice, the output is expected to be provided by the client application consuming the query service.
- Open
-
Specify Query
- Open
query.jsonfile; -
Compose:
- Save and close the file
The query is a SQL statement that returns a data set for populating the
customerobjects.If you have a SQL editor extension, such as
Database Client, installed, you may validate the SQL directly in this step. - Open
-
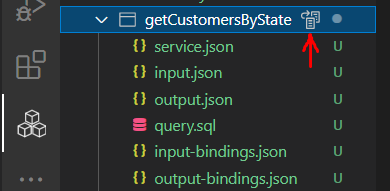
Generate input and output Bindings
- From
getCustomersByStateservice bar, clickGenerate Input and Output Bindingsicon ;
;
- Open
input-bindings.jsonand review the input bindings; -
From the
output-bindings.jsonbar, click theOpen with Json Viewericon , open and review output bindings in JSON file and JSON grid side by side:
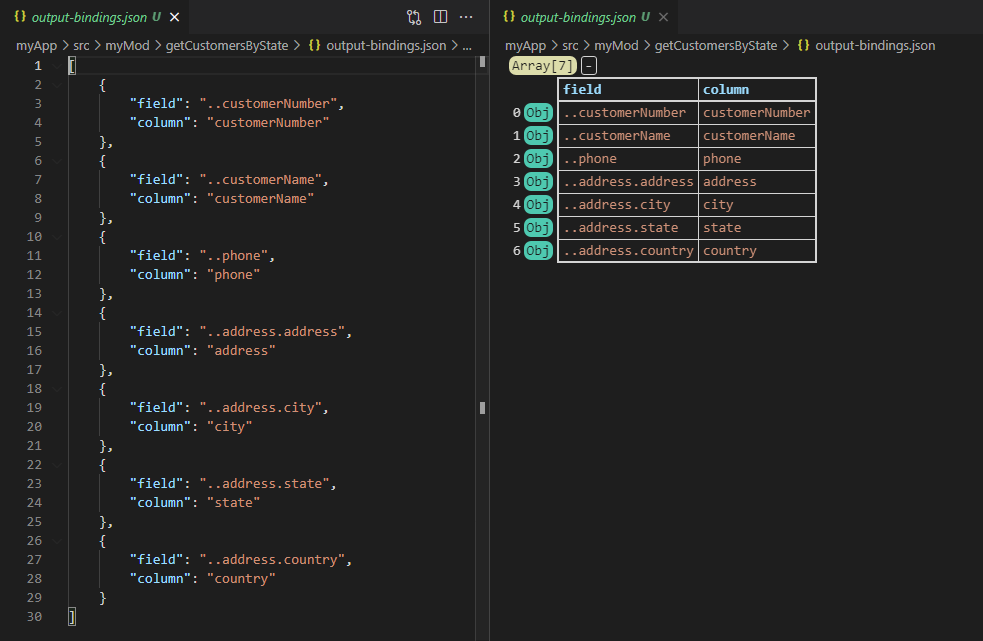
Edit output bindings, if necessary, in the JSON file and observe change in the JSON grid (skip).
The service engine relies on the input bindings to bind the query parameters and on the output bindings to transform the data set. The input and output bindings generated are not guaranteed to be correct 100% of the time, depending on your query problem. Thus it is important for the developer to review and correct, if needed, these bindings.
- From
-
Deploy Service
- From
getCustomerByStateservice bar, click DEPLOY icon ;
;
The status bar reads:

or error message, if any:

- From
The purpose of this step is to pre-validate the service.
-
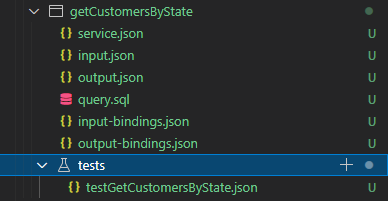
Test Service
- From
Testsbar, clickAdd Testicon , to generate a test file;
-
Open
testGetCustomerByState.json, and edit the input; -
click
Run Testbutton in the upper right corner to test the service. The test result is returned on the side.
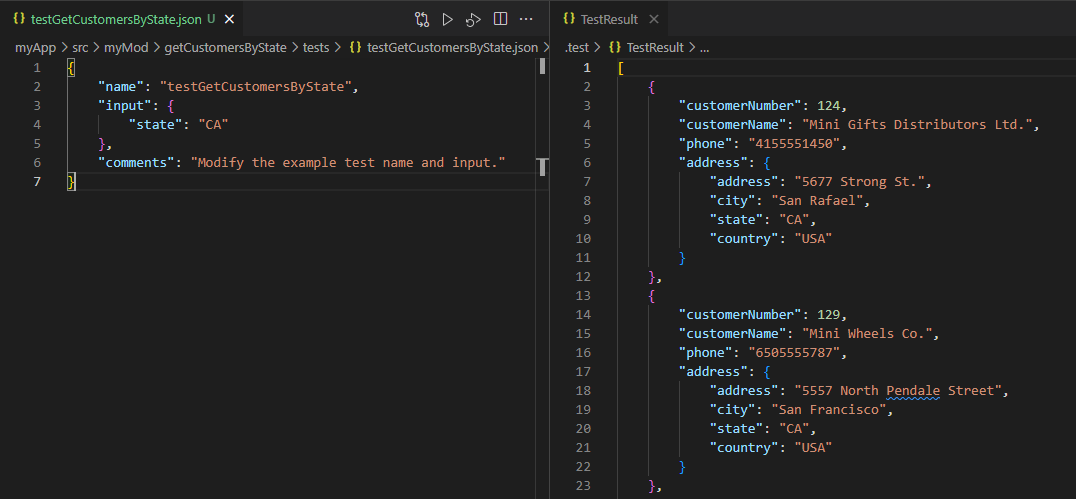
-
Close all open files.
- From
Takeaway
There are three parts in specifying a query service:
- Specifying the input and output
- Specifying the query, and
- Generating and reviewing the input and output bindings
The input and output defines the query problem to solve; the query, together with the input and output bindings, provides the solution to the problem. Given that the input and output bindings are largely generated, the main work of query service development is to write the SQL query for populating the output object.
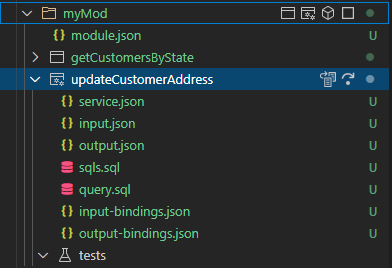
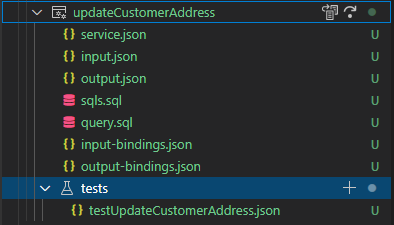
Create SQL Service
For this tutorial, we are to create a SQL service to update the address of a customer, and return the customer object with updated address.
Steps
-
Generate Service
- From
myModmodule bar, clickNew SQL Serviceicon .
. - Enter
updateCustomerAddressas service name. Hit Enter.
A SQL service named
updateCustomerAddressis generated: - From
-
Specify Input
- Open
input.jsonfile -
Type or paste:
- Save and close the file
The input is the address information.
- Open
-
Specify Optional Output
- Open
output.jsonfile -
Type or paste:
- Save and close the file
The output is a
customerobject. - Open
-
Specify SQLs
- Open
sqls.jsonfile -
Compose the SQL statement(s):
- Save and close the file
The SQLs is a single update statement to update the address information of a customer, although multiple DML statements may be used as needed.
If you have a SQL editor extension such as
Database Clientinstalled, you may validate the SQL directly in this step. - Open
-
Specify Optional Query
- Open
query.jsonfile -
Compose the query:
- Save and close the file
The query is a SQL statement to return the
customerdata set. - Open
-
Generate input and output Bindings
-
From
updateCustomerAddressservice bar, clickGenerate Input and Output Bindingsicon. The status bar reads:

or any error message.
-
From the
input-bindings.jsonbar, click theOpen with Json Viewericon, open and review input bindings in JSON file and JSON grid side by side: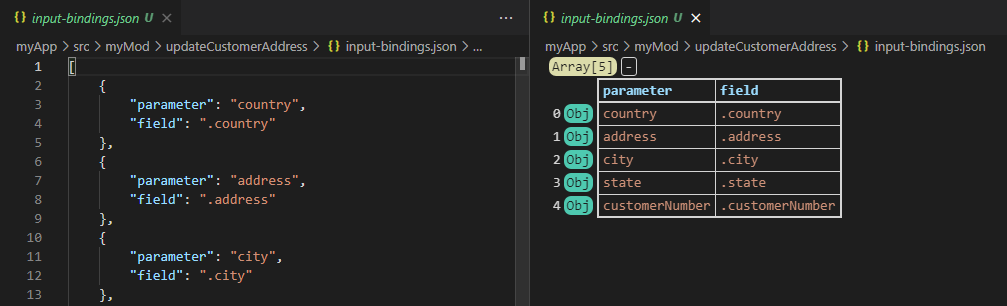
-
From the
output-bindings.jsonbar, click theOpen with Json Viewericon, open and review output bindings in JSON file and JSON grid side by side: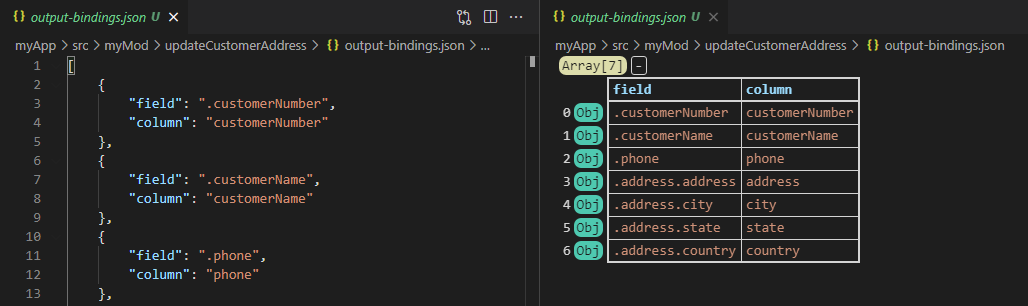
Edit output bindings, if necessary, in JSON file and observe change in JSON grid (skip).
-
-
Deploy Service
-
From
updateCustomerAddressservice bar, click deploy icon;The status bar reads:
or any error message.
-
The purpose of this step is to pre-validate the service.
-
Test Service
- From
Testsbar, clickAdd Testicon, to generate a test file;
-
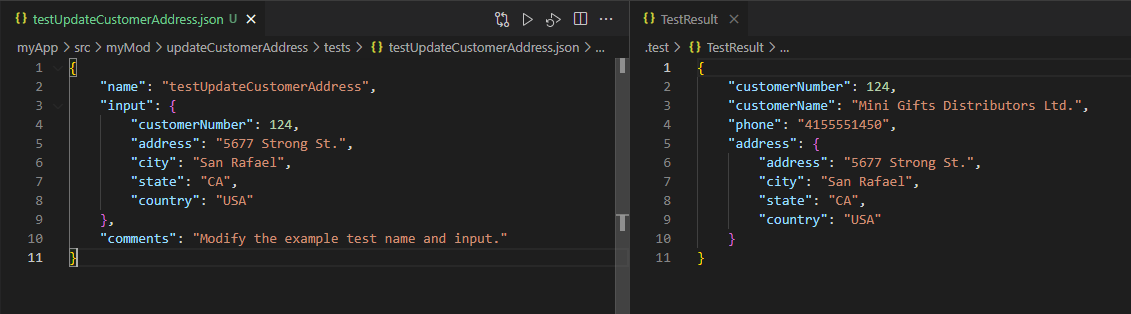
Open
testUpdateCustomerAddress.json, and edit the input; -
click
Run Test button at upper right corner to test the service. The test result is returned on the side:
- Close all open files.
- From
You may also test the SQL service with the
Run Test without Commit
Takeaway
There are three parts in specifying a SQL service:
- specifying the input and output
- specifying the sqls and the query, and
- generating and reviewing the input and output bindings
SQL service is a command service. The focus is on the commands making database changes, or the SQL statements in the sqls.sql file. The query is optional and is for inspecting changes made by the commands.
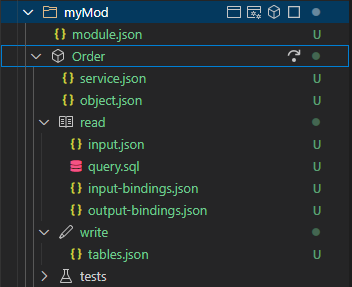
Create Repository Service
For this tutorial, we are to create a repository service for
Orderobject. The read operation supportsgetOrderByOrderNumber,getOrdersByCustomerNumberandreadAllOrders.
Steps
-
Generate Service
- From
myModmodule bar, clickNew Repository Serviceicon .
. - Enter
Orderas service name. Hit Enter.
A repository service named
Orderis generated: - From
-
Specify Object
- Open
object.jsonfile -
Type or paste:
{ "orderNumber": 10101, "orderDate": "2003-01-09T00:00:00.000Z", "requiredDate": "2003-01-09T00:00:00.000Z", "shippedDate": "2003-01-09T00:00:00.000Z", "status": "Shipped", "customerNumber": 128, "orderLines": [{ "orderLineNumber": 1, "productCode": "S18_2795", "quantityOrdered": 26, "priceEach": 167.06 }] } -
Save and close the file
The object is the
Orderobject embedding an array oforderLines. - Open
For read,
-
Specify READ Input
- Open
input.jsonfile -
Type:
-
Save and close the file
The input includes two query parameters to support
readOrderByOrderNumberandreadOrdersByCustomerNumber, respectively. - Open
-
Specify READ Query
- Open
query.sqlfile -
Compose:
select ord.orderNumber, ord.orderDate, ord.requiredDate, ord.shippedDate, ord.status, ord.customerNumber, od.orderLineNumber, od.productCode, od.quantityOrdered, od.priceEach from orders ord left join orderdetails od on od.orderNumber = ord.orderNumber where 1 = 1 and ord.orderNumber = :orderNumber and ord.customerNumber = :customerNumber order by ord.orderNumber, od.orderLineNumber -
Save and close the file
This query supports
readOrderByOrderNumber,readOrdersByCustomerNumberandreadAllOrders. The repository query is dynamic by design. TheWHEREclause of this query is formulated to support all three read operations. - Open
-
Generate input and output Bindings
-
From
readbar, clickGenerate Input and Output Bindingsicon: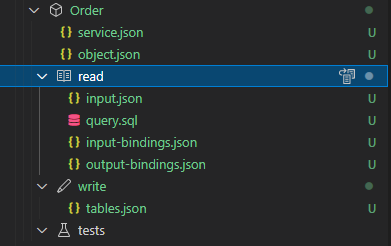
The status bar reads:
-
From the
input-bindings.jsonbar, click theOpen with Json Viewericon, open and review input bindings in JSON file and JSON grid side by side. -
From the
output-bindings.jsonbar, click theOpen with Json Viewericon, open and review output bindings in JSON file and JSON grid side by side. Edit output bindings, if necessary, in JSON file and observe change in JSON grid (skip).
-
For write,
-
Generate Table Bindings
-
From
writebar, clickGenerate Table Bindingsicon :
: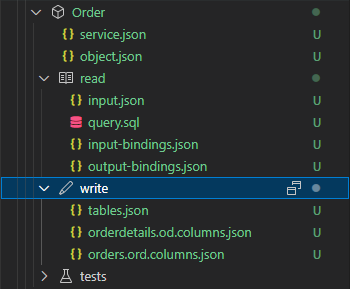
The status bar reads:
The
orderdetails.od.columns.jsonandorders.ord.columns.jsonfiles are added. -
From the
tables.jsonbar, click theOpen with Json Viewericon, open and review table bindings in JSON file and JSON grid side by side. Close the files when done.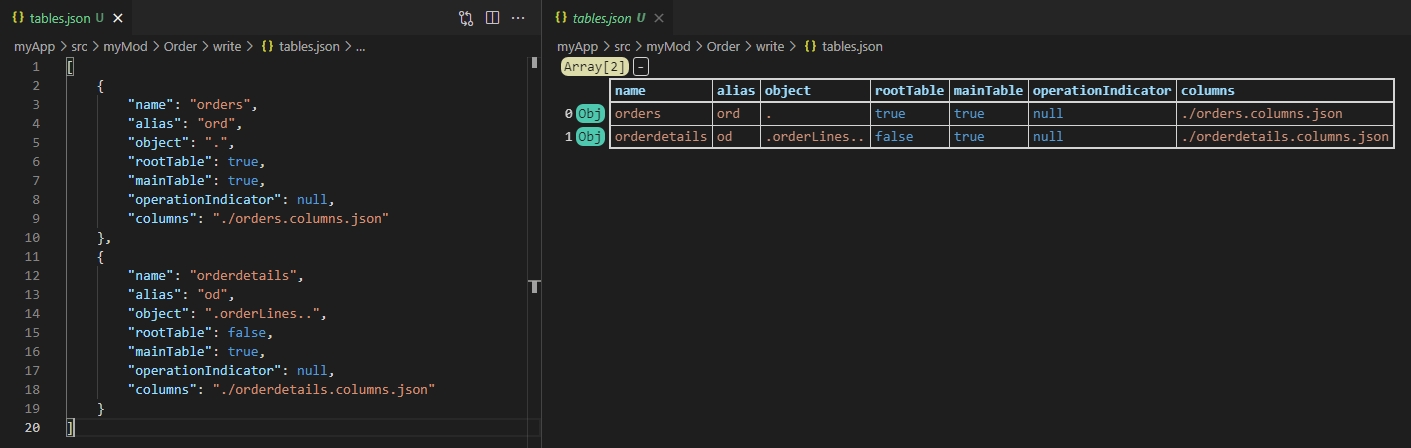
-
From the
order.ord.columns.jsonbar, click theOpen with Json Viewericon, open and review columns bindings for orderstable in JSON file and JSON grid side by side. If desired, move JSON grid below JSON file for a better view of JSON grid. Close the files when done.
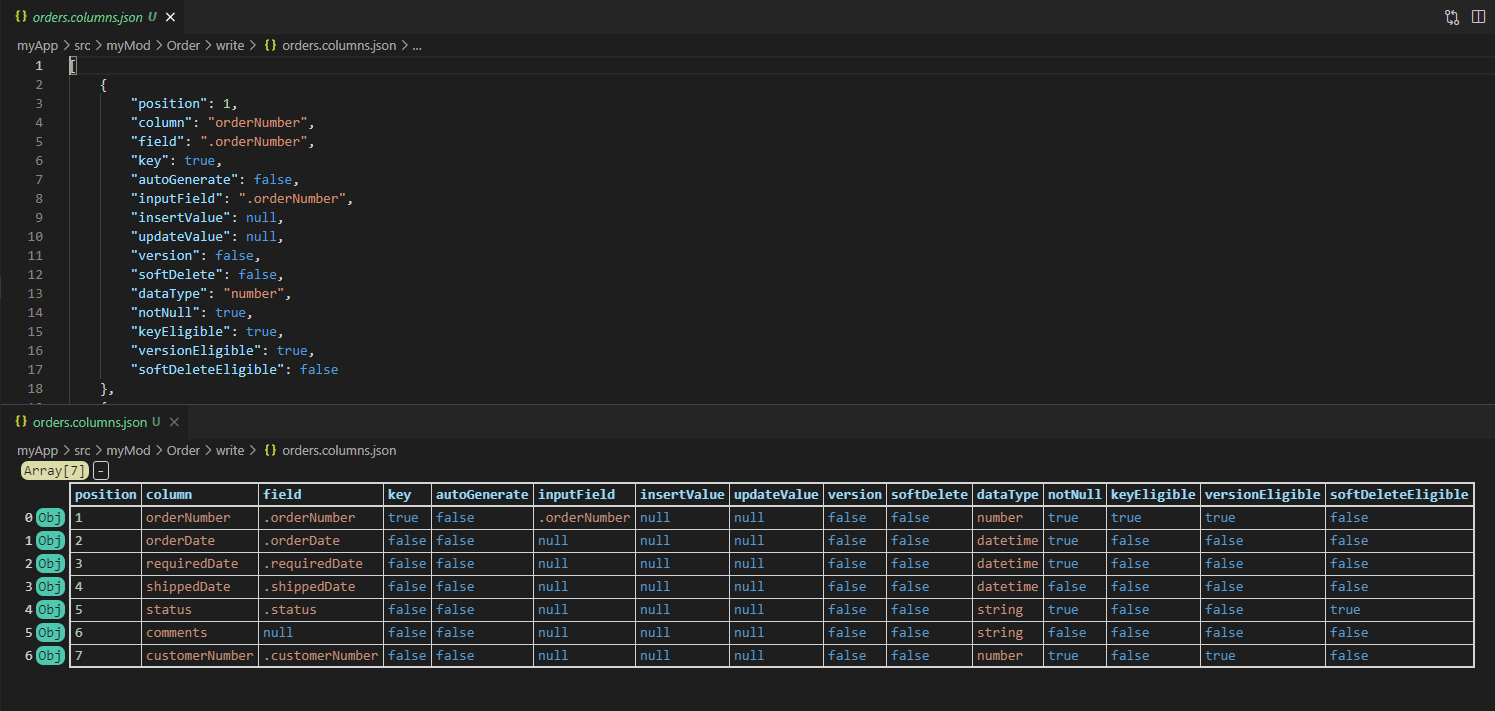
Edit column bindings, if necessary, in JSON file and observe changes in JSON grid (skip).-
From the
orderdetail.od.columns.jsonbar, click theOpen with Json Viewericon, open and review columns bindings for orderdetailstable in JSON file and JSON grid side by side. If desired, move JSON grid below JSON file for a better view of JSON grid. Close the files when done.Edit column bindings, if necessary, in JSON file and observe changes in JSON grid (skip).
-
-
Deploy Service
-
From
Orderservice bar, click deploy icon;The status bar reads:
or any error message.
-
-
Create Tests
- From
Testsbar, clickAdd Test icon; -
Select
allfrom the quick pick. Hit Enter.A set of test files are generated, one for each repository operation:
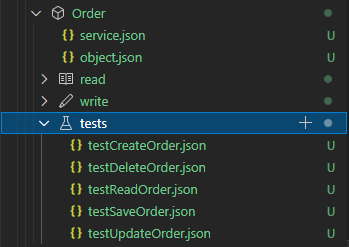
- From
testReadOrder.jsonbar, clickDUPLICATEicon twice to add two more
 readtests,
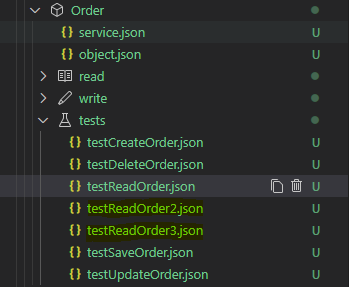
- Rename the three read test files to
testReadAllOrders.json,testReadOrderByOrderNumber.jsonandtestReadOrdersByCustomerNumber.json, respective;
- From
-
Test Create Operation
-
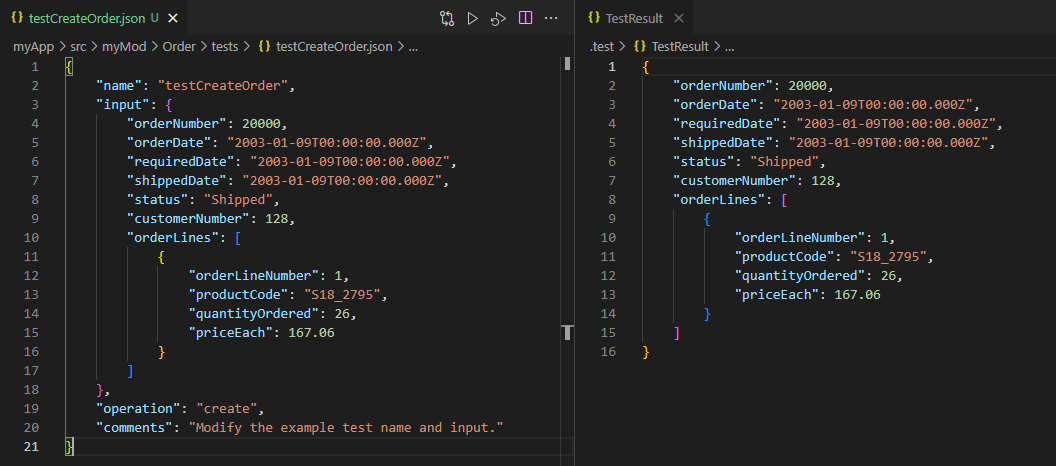
Open
testCreateOrder.json, and edit the input to change theorderNumberto 20000:{ "name": "testCreateOrder", "input": { "orderNumber": 20000, "orderDate": "2003-01-09T00:00:00.000Z", "requiredDate": "2003-01-09T00:00:00.000Z", "shippedDate": "2003-01-09T00:00:00.000Z", "status": "Shipped", "customerNumber": 128, "orderLines": [ { "orderLineNumber": 1, "productCode": "S18_2795", "quantityOrdered": 26, "priceEach": 167.06 } ] }, "operation": "create", "comments": "Modify the example test name and input." } -
click
Run Test button at upper-right corner to test the service. A new order is created in database and returned on the side:
-
-
Test Update Operation
-
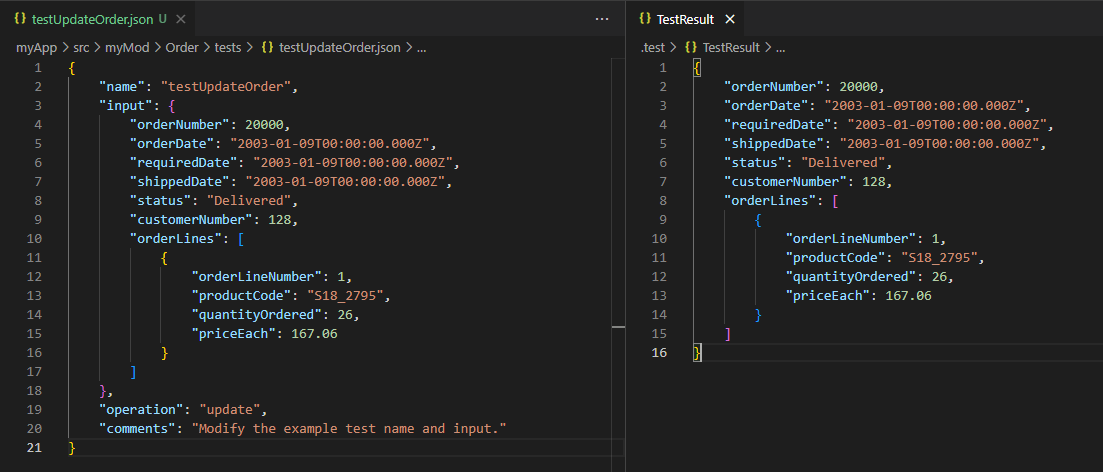
Open
testUpdateOrder.json, and edit the input to change theorderNumberto 20000 and thestatustoDelivered:{ "name": "testUpdateOrder", "input": { "orderNumber": 20000, "orderDate": "2003-01-09T00:00:00.000Z", "requiredDate": "2003-01-09T00:00:00.000Z", "shippedDate": "2003-01-09T00:00:00.000Z", "status": "Delivered", "customerNumber": 128, "orderLines": [ { "orderLineNumber": 1, "productCode": "S18_2795", "quantityOrdered": 26, "priceEach": 167.06 } ] }, "operation": "update", "comments": "Modify the example test name and input." } -
click
Run Test button at upper-right corner to test the service. The order is updated in database and returned on the side:
-
-
Test Read Operations
-
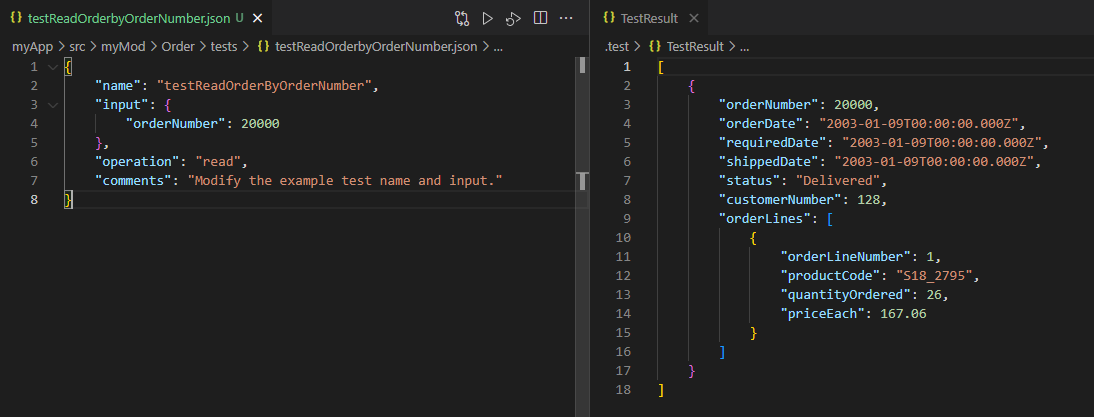
Open
testReadOrderByOrderNumber.json, and edit the input so that it looks like: -
click
Run Test button at upper-right corner to test the service. The order is returned on the side:
-
Open
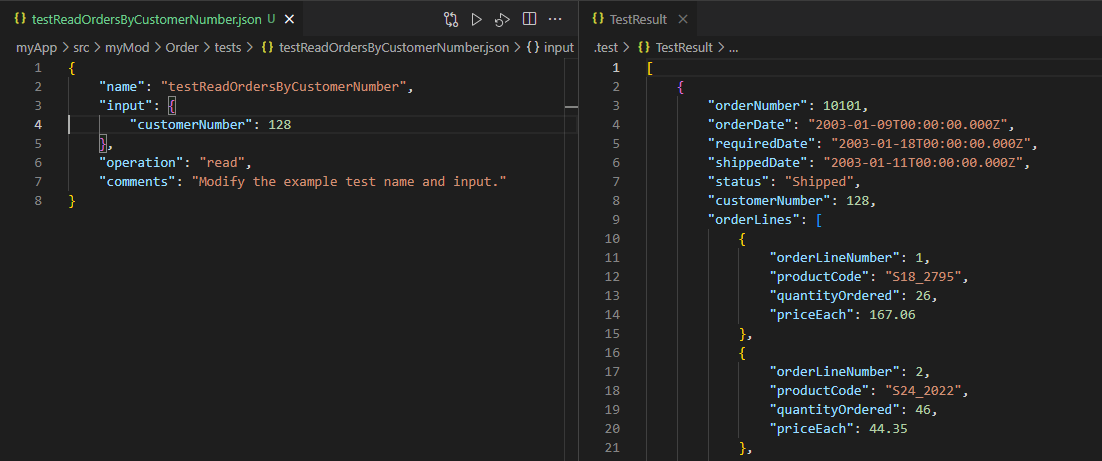
testReadOrdersByCustomerNumber.json, and edit the input so that it looks like: -
click
Run Test button at upper-right corner to test the service. A list of orders is returned on the side:
-
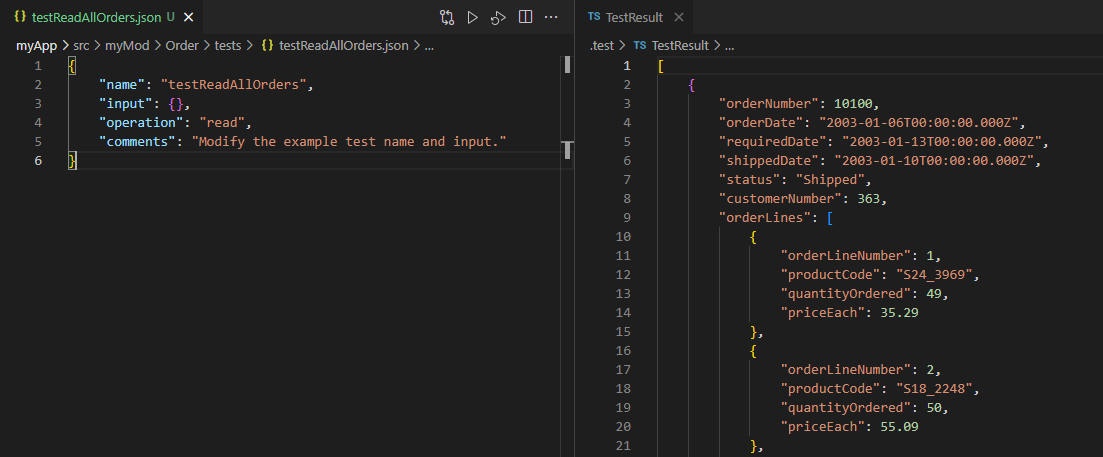
Open
testReadAllOrders.json, and edit the input so that it looks like: -
click
Run Test button at upper-right corner to test the service. The full list order is returned on the side:
-
-
Test Delete Operation
-
Open
testDeleteOrder.json, and edit the input, so that it looks like: -
click
Run Test button at upper-right corner to test the service. The order is deleted from the database.
The
inputofdelete testis copied frominputof thereadcomponent. It needs to be cleaned up to have thekey fieldsonly. -
Takeaway
There are three parts in specifying a repository service:
- specifying the object
- specifying the read component, and
- specifying the write component
The read component is a query, with the output being the repository object. Therefore, the main work in developing the read side of the repository service is writing the SQL query for populating the repository object. The repository query is dynamic by design, to tender the need to support different read operations.
The write component comprises a set of table and column bindings, which specify what tables to write and what values to write to each table when persisting the object. The table and column bindings are generated from the read component. Therefore, the repository service development is centered around the SQL query of the read component.
Sync Application
From the myApp application bar, click the the deploy icon to redeploy the application, which syncs the application deployed in the remote workspace with the application in your local work folder.
Inspect and Test Deployments
-
Inspect Application Deployment
-
From
Applicationsbar ofDEPLOYMENTSexplorer, clickRefresh Application Listicon , to show the list of applications deployed in the workspace.
-
From
myAppbar inDEPLOYMENTSexplorer, clickRefresh Applicationicon, to show the list of services of the application deployed in the workspace.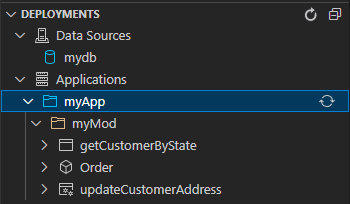
We see all services under the
myModmodule.
-
-
Test Service Deployment
-
From
Orderbar inDEPLOYMENTSexplorer, clickView Testsicon , to show the test file for the service.
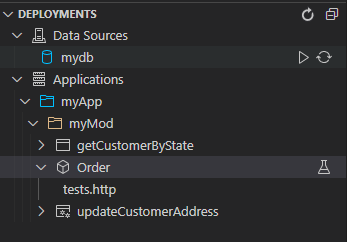
All tests deployed into the remote workspace with the service are consolidated into a single
test.httpfile, in a format that can be readily executed with theREST ClientVS Code extension. -
Open the
test.httpfile, and from the file clickSend Requestunder### testReadOrdersByCustomerNumber. The test is executed and response is shown on the side.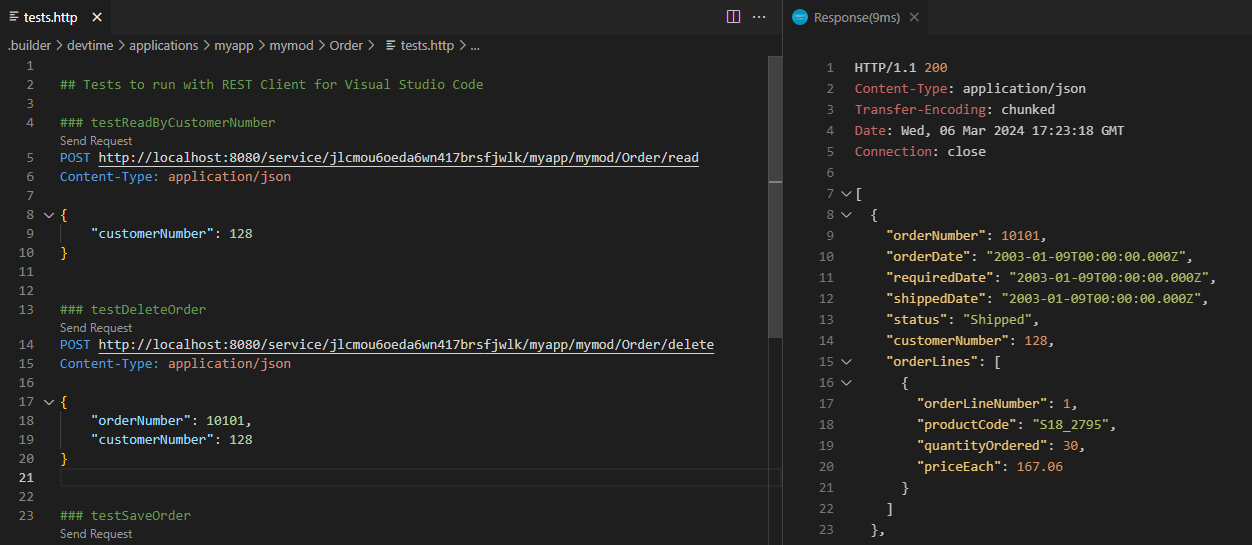
-
The test is executed from the workspace service endpoint.
Conclusions
In this tutorial, we have shown you how to create a query, SQL and repository service, respectively. As you have seen, all services are around development of SQLs. Therefore, it is important to have a SQL editor extension, such as Database Client, installed in your VS Code for data access development.
What Is Next
Move on Data Access Service Deep Dives for a deeper understanding of data access service.