Getting Started with Runtime Server
Runtime Server is the platform for deploying and running data access applications. The Docker image of the Runtime Server is published in the AWS ECR Public Gallery under backlogic.
Runtime Server is meant to be launched as a data access runtime platform in the cloud, next to the database, using a container service like AWS Fargate, as shown below:

The data source configurations and data access applications can then be deployed to the platform by uploading them into a S3 bucket or code repository. The runtime server polls the S3 bucket periodically and syncs its local code repository with the S3 code repository.
The code repository is divided into namespaces. Under each namespace, there is a datasources folder for data source configuration files and an applications folder for data access applications. The data source configuration file must be a json file, with the file name being the data source name. The data access application must be zipped and uploaded as a zip file, with the file name being the application name. For example, for data source name mydb, the configuration file name should be mydb.json; for application name myapp, the zip file name should be myapp.zip.
In this tutorial, however, we will show you how to launch the Runtime Server on your local machine with Docker Compose and how to deploy data source configuration and data access application to the local Runtime Server through S3 bucket.
Prerequisite
- AWS account for S3 bucket.
- Docker, Docker-Compose, Git installed
- Familiar with AWS S3 and Swagger-UI.
Launch Runtime Server
Create S3 Bucket for Deploying Data Source and Application
Go to AWS Console and create:
- A S3 bucket my-bucket-name in
us-west-2region; - A
myspacefolder in the my-bucket-name bucket, and - Two subfolders,
datasourcesandapplications, undermyspace,
as the code repository for the Runtime Server.
Create Local Directories for Launching Runtime Server
Create and navigate to the directory for launching Runtime Server:
Create Docker-Compose File
Create the docker-compose file for launching the Runtime Server and the sample MySQL database:
Copy and paste the following into the file:
version: "3.3"

services:
  runtime:
    image: "public.ecr.aws/backlogic/service-runtime:1.5.23"
    container_name: "runtime"
    ports:
      - "8080:8080"
    environment:
      - backlogic.aws.region=my-aws-region
      - backlogic.aws.credentials.accessKeyId=my-access-key-id
      - backlogic.aws.credentials.secretAccessKey=my-secret-access-key
      - backlogic.synchronizer.s3.bucket=my-bucket-name
      - spring.profiles.active=prod
    restart: "unless-stopped"
    volumes:
      - /var/run/docker.sock:/var/run/docker.sock:ro
  mysql:
    image: "public.ecr.aws/backlogic/sample-mysql:latest"
    container_name: "mysql"
    ports:
      - "3306:3306"
    restart: always
    volumes:
      - /var/run/docker.sock:/var/run/docker.sock:ro
Modify the backlogic properties with proper values. The backlogic.synchronizer.s3.bucket property should be the name of the S3 bucket created above, and the backlogic.aws.region should be the AWS region of the S3 bucket. You also need to configure AWS access key id and access secret key for accessing the S3 bucket.
Launch Runtime Server
Launch the Runtime Server and check its logs:
You are expected to see a Spring Boot application started.
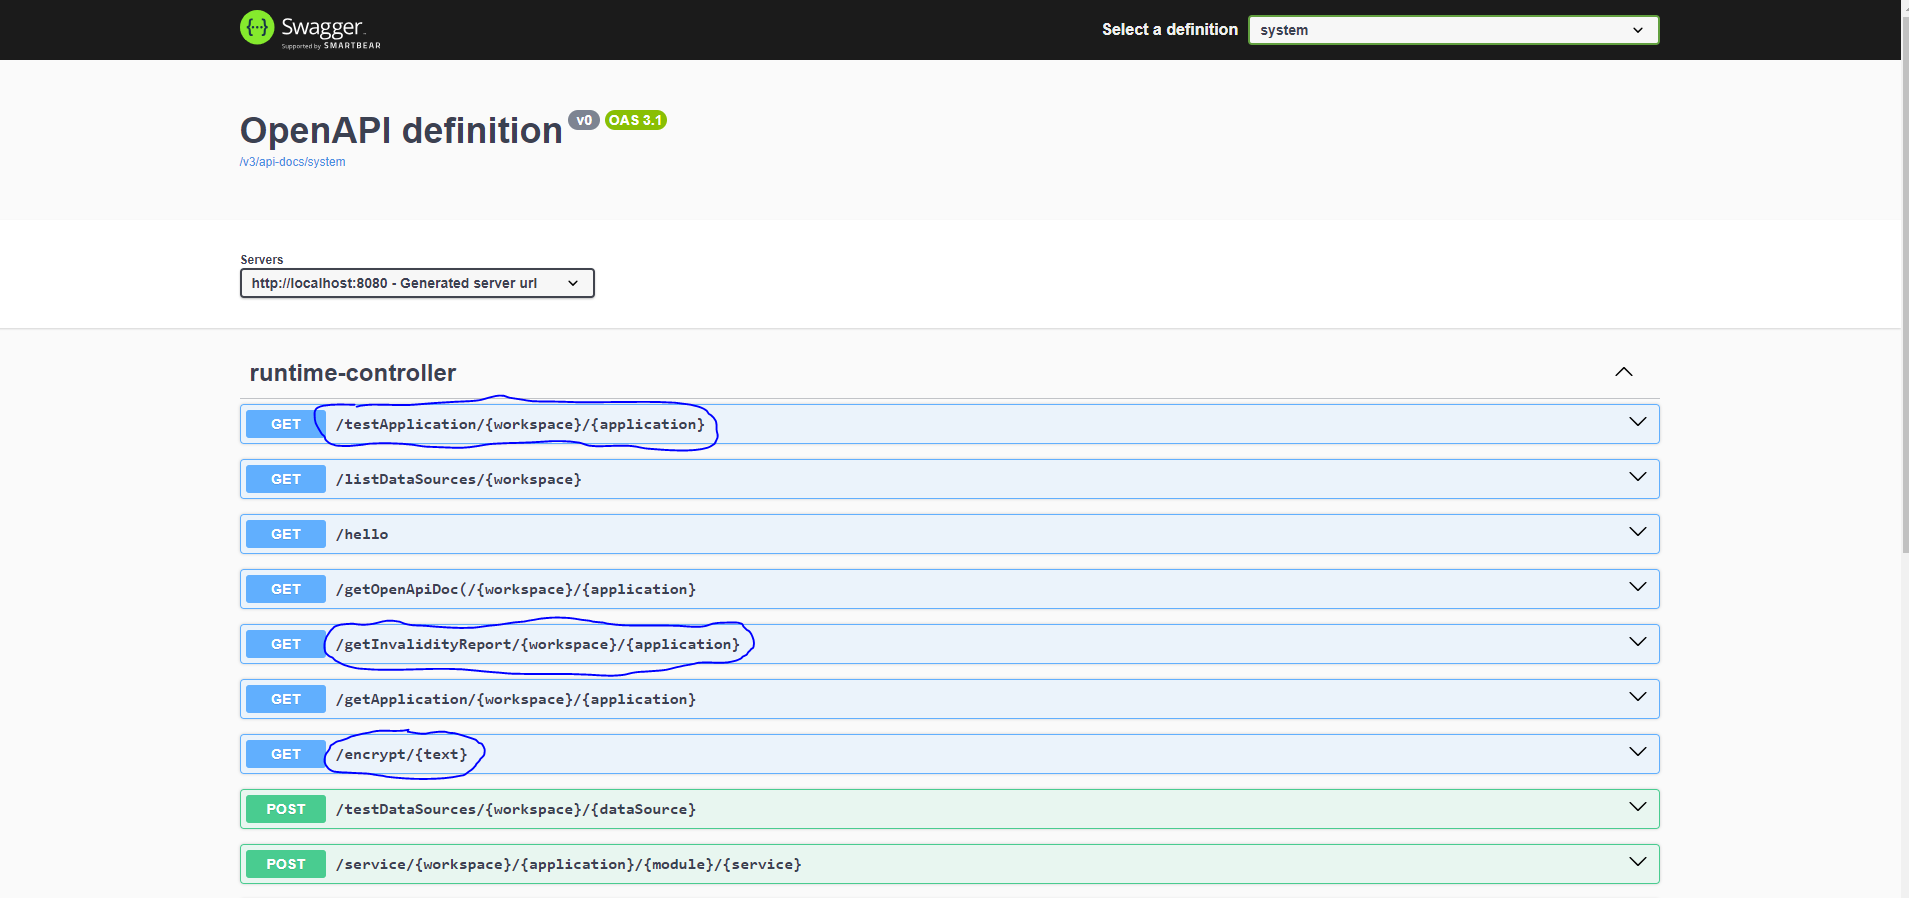
Validate Runtime Server
Open a browser and navigate to Swagger-UI page:
At this step, you should see the various System APIs provided by the Runtime Server as below, if the launch is successful.
Deploy Data Source
Besides the Runtime Server, the above steps also start a sample MySql database, with mysql as the host name. The sample database classicmodels from MySQL Tutorial is loaded into the classicmodels database of the sample database server, which can be accessed by connecting as user sample with password password123.
Create Data Source Configuration File
Create the data source configuration file for data source name mydb:
Copy and paste the following into the mysql-db.json file:
{
    "dbType": "mysql",
    "host": "mysql",
    "port": 3306,
    "database": "classicmodels",
    "username": "sample",
    "password": "VYk9KIfJnH4HPfqIe7Hbmw==",
    "comments": "mysql data source"
}
Encrypt Password
The database password in the data source file must be encrypted. The Runtime Server provides an API /encrypt for this purpose. Go to the Swagger-UI page and encrypt the password password123 with the /encrypt API, and then update the data source file with the encrypted password.
Note: If for any reason, the runtime container is stopped, you must repeat this step after the container is restarted.
Upload Data Source File
Go to AWS Console and upload the data source file into the /myspace/datasources folder. The data source will be deployed in 180 seconds maximum.
Check the runtime logs:
You should see:
~ : S3 synchronizer deploying data source myspace/mydb ...
~ : posting data source event for data source: myspace/mydb
~ : data source deployed
~ : update event received by DataSourceManager for myspace/mydb
Deploy Data Access Application
Download Example Data Access Application
Download the example application from GitHub:
At this step, the example application is cloned on your machine into the example directory.
Modify Application File
Inspect the application file:
It possibly shows:
{
    "name": "myApp",
    "description": "Example data access application.",
    "dbType": "mysql",
    "dataSource": "mydb",
    "schema": null
}
Now modify the file and especially the dataSource and schema fields to match the data source mydb, so that we have:
{
    "name": "example",
    "description": "Example data access application.",
    "dbType": "mysql",
    "dataSource": "mydb",
    "schema": "classicmodels"
}
in the example/src/application.json file.
Package Application
Zip the src folder of the example application into example.zip:
At this step, we should see the example.zip file generated with its internal file structure starting with
Note: This step can also be performed with other zip utilities, as long as we have the
example.zipfile produced with the correct file structure inside.
Upload Application
Go to AWS Console and upload the exmaple.zip file to the /myspace/applications folder. Watch the Runtime Server logs. The application should be deployed in 180 seconds maximum.
By default, the Runtime Server polls the S3 bucket with an interval of 180 seconds. This value can be adjusted through the backlogc.synchronizer.s3.s3PollIntervalInSeconds property:
Validate Deployment
Go back to the Swagger-UI, refresh the page and check Select a Definition dropdown. We should see an additional item application/myspace/example.
View Application APIs
Select the application/myspace/example and we should see all the data access service APIs for the example data access application:
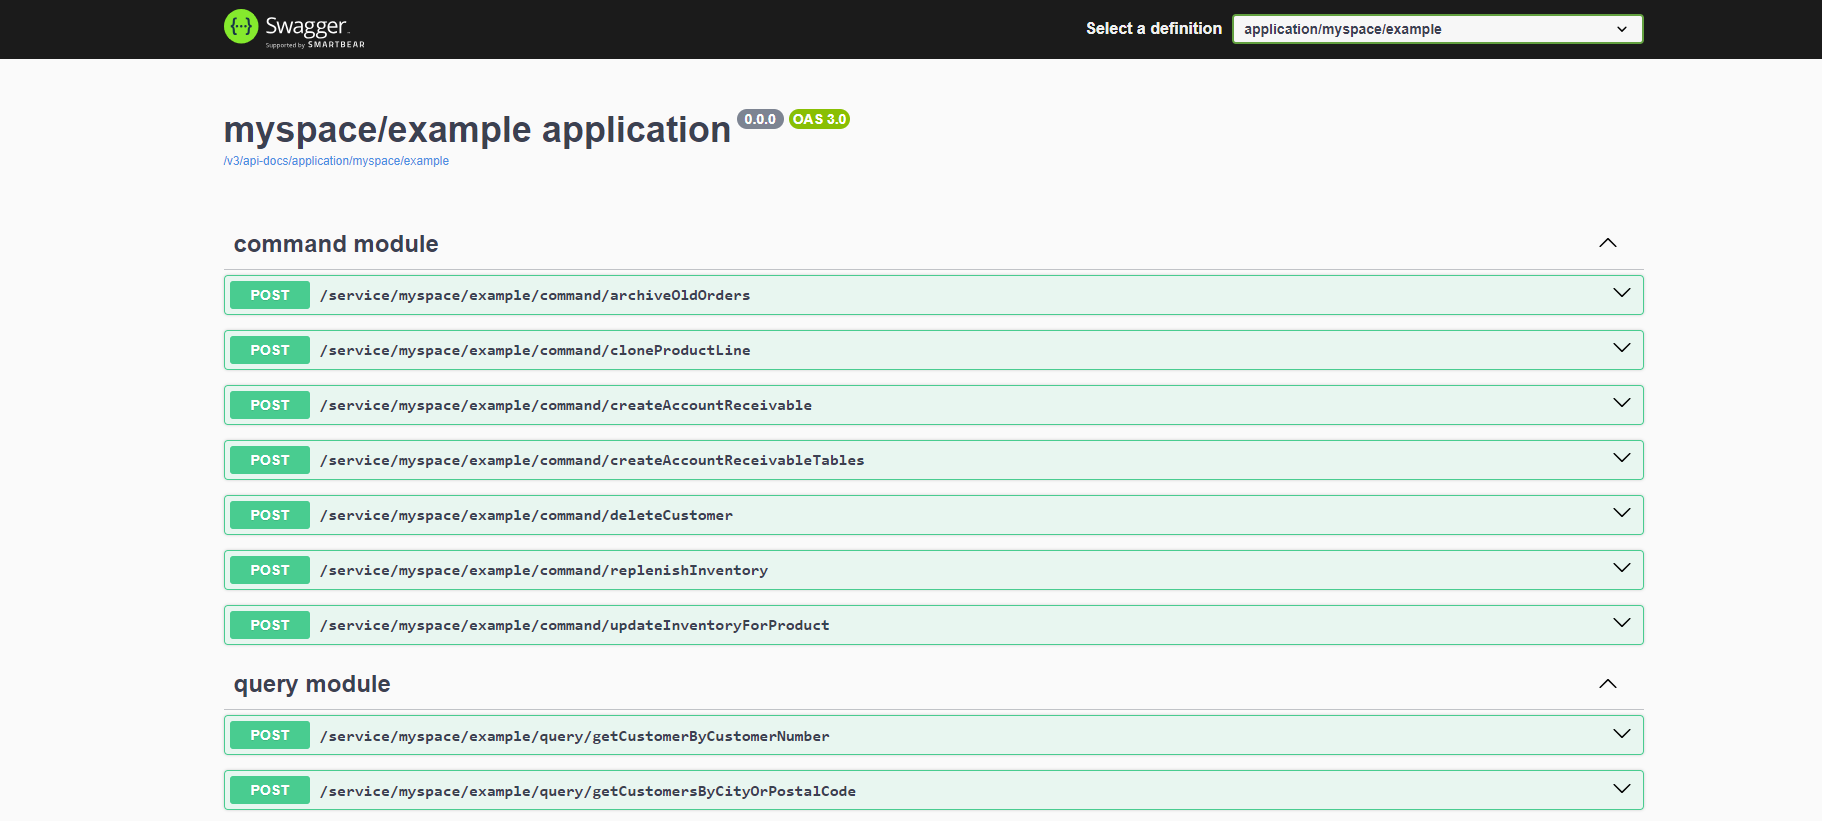
Test a Data Access Service
Go to the /service/myspace/example/query/listEmployees API and execute it. You should see it returns a list of complex employee objects.
Invalidity Report
Back to the System APIs, we should see a /getInvalidityReport API. Executing this API generates an Invalidity Report, which shows how many and which data access services are invalid, along with the reason why they are invalidated.
An example is as follows:
{
  "applicationUri": "myspace/example",
  "reportTime": "2023-12-15T20:31:26.358329Z",
  "applicationVersions": {
    "runtime": null,
    "builder": "1.1.5-SNAPSHOT"
  },
  "runtimeVersion": "1.3.0",
  "totalServiceCount": 27,
  "invalidServiceCount": 1,
  "invalidServices": [
    {
      "uri": "myspace/example/command/createAccountReceivable",
      "serviceType": "sql",
      "reason": "Failed to parse the query: select ar.receivableNumber, ar.customerNumber, ar.receivableDate, \n       ar.receivableAmount, ard.orderNumber, ard.orderAmount\n  from accountReceivables ar\n  join accountReceivableDetails ard on ard.receivableNumber = ar.receivableNumber\n where ar.receivableDate = :receivableDate\n order by ar.receivableNumber, orderNumber"
    }
  ]
}
Testing and Test Report
Back to the System APIs, we should also see a /testApplication API. Executing this API executes all the tests associated with the data access services of an application and produces a Test Report, which shows how many tests and which tests for which data access services have failed, along with the reason why they have failed.
Encrypt/Decrypt Key
The password supplied in the data source file must be encrypted with an AES key by user. The Runtime Server then decrypts the password at runtime. Therefore, it must have access to the AES key that is used to encrypt the password.
Note: - The encrypted key must be Base64 encoded. - The Runtime Server never writes the decrypted password in any file or log.
Runtime Server Generated Key
By default, the Runtime Server dynamically generates the key on each startup unless another key is configured. Then the user must encrypt the password with the Runtime Server API. This approach only works in one-time testing environment, such as for this tutorial, as the AES key changes on each startup.
User Supplied Key
The user may configure an AES key with an environment property backlogic.aesKey:
There are many online generators available for AES key. The Runtime Server also provides an API /generateAesKey for this purpose. If the user choose an online tool, the password may be encrypted either with the online tool or with /encrypt API of the Runtime Server. In this case, the Runtime Server use the user supplied key to encrypt the password if used.
AWS KMS Key
The user may configure the Runtime Server to use the AWS KMS service with the backlogic.aws.kms.keyId property:
The password may be encrypt with either AWS KMS or the /encrypt API of Runtime Server. In this case, the Runtime Server use the AWS KMS key to encrypt the password if used.